HARDWARE INSTALLATION
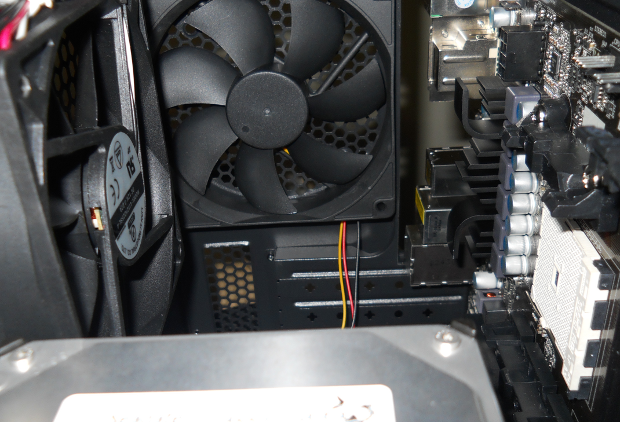
The positioning of the 3.5″ drive cage in the Cougar Spike necessitates careful choice in your order of component installation. This is where test fitting of components prior to permanently tightening anything down proves its value. To test the viability of having a fan installed in the upper mounting position on the left side panel, we need to consider the impact this will have on the maximum height CPU cooler we can then install. The maximum cooler height without the 120mm fan installed is 160mm. With a standard 120mm case fan having a depth of 25mm, this reduces that maximum cooler height to 135mm.
To give you a better visualization of this 135mm, look at the rear 120mm fan in the next image for scale. By the time we drop the processor into the motherboard socket and latch it down, you can see that 135mm is going to limit your options. If you utilize a cooler with fans mounted at a 90-degree angle to the motherboard, you will be limited to models with a 92mm or smaller fan(s). If you utilize a cooler with fan(s) mounted parallel with the motherboard, you may be rendering use of the side panel fan in that position pointless.
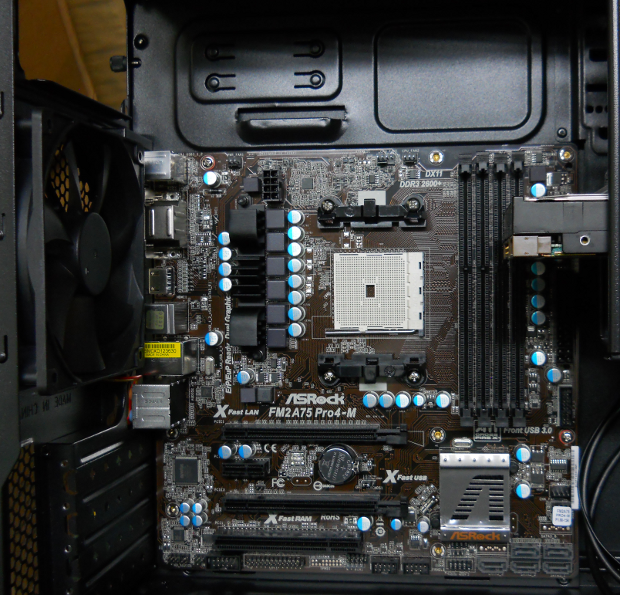
The next image shows our ASRock FM2A75 PRO4-M microATX motherboard temporarily secured with only two of the mounting screws, and a 3.5″ mechanical HDD latched into the upper mounting slot of the 3.5″ cage. Note how far out over the DIMM slots the HDD extends. By the time we connect data and power cables to the HDD, we are now extended out over all four of the DIMM slots. This limits the height of DIMM modules you can use to either standard-height or low-profile versions. Anything with a taller heat spreader will come into contact with the HDD and its cables. Now if we were to add a CPU cooler to this image, it suddenly becomes apparent that the 3.5″ HDD could not be removed from the cage without first removing the CPU cooler. But with no cutout in the motherboard tray, we would need to remove the motherboard in order to remove the cooler — hardly a palatable scenario just to swap out a 3.5″ HDD. This also demonstrates that if using a 3.5″ HDD the order of assembly would need to be to install the 3.5″ HDD first — even before the motherboard. Then we can install the cooler to the motherboard, snap in the DIMM modules, and tilt the assembly in under the protruding HDD and screw it to the motherboard tray. The obvious solution to this whole situation would be to utilize a 2.5″ form factor HDD or SSD screwed to the inside of the bottom panel, and forgo utilizing the 3.5″ drive cage altogether.
But let us not forget that the target market for the Cougar Spike is the gamer on a budget. Gamers are often all about their graphics cards. The Spike supports cards up to 330mm long, so this opens up loads of options for future graphics card upgrades. Swapping out a graphics card would be a simple operation in the Spike. The case is designed giving preference to the graphics card part of the hardware equation.
 Technology X Tomorrow's Technology Today!


