INSTALLATION
We found the installation process to be fairly quick and easy, for the most part. Thermaltake’s instructions are simple and easy to follow and their decision to separate and label all of the accessories made it even easier.
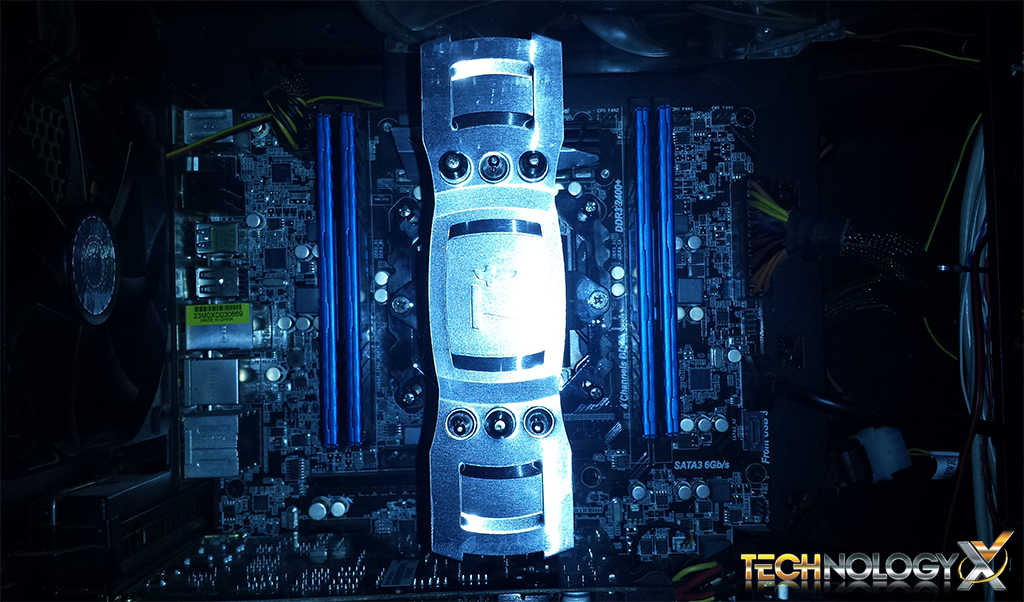
We installed our sample on an Intel LGA 2011 motherboard, which foregoes the need for the included back-plate. You simply attach four nuts to the designated holes on the motherboard, place the bracket on top and secure with four short screws. You then apply the thermal paste to the CPU, place the heat-sink on top and attach the mounting plate, securing it tightly with the two mounting screws.
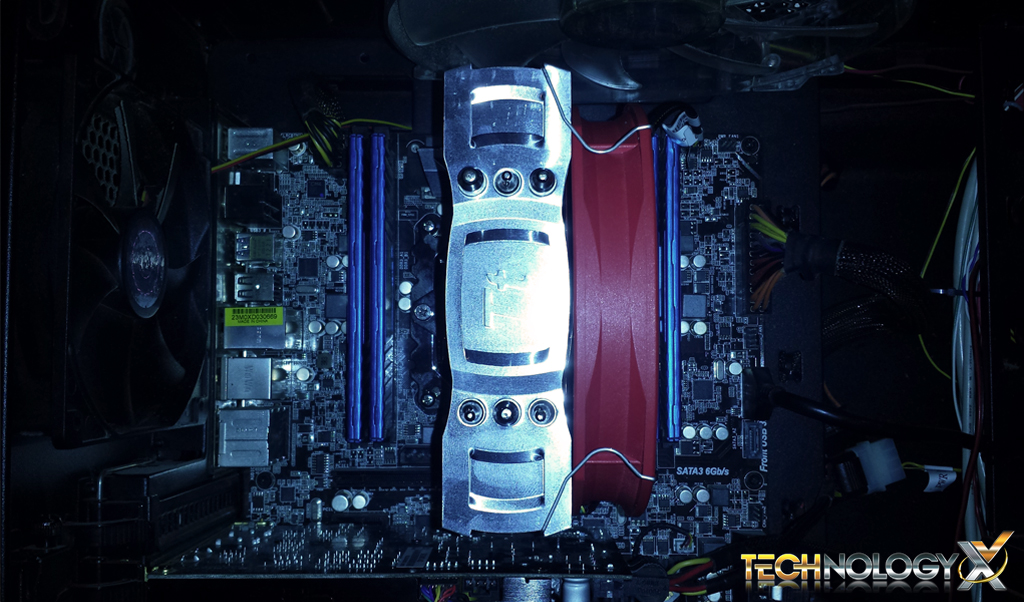
However, after installing the heat-sink, next is the fan, which is usually the easiest part of a CPU cooler’s installation. Unfortunately, this is not the case here, as Thermaltake’s awkward fan clips made the process much more painful that it should be. As we mentioned earlier the clips attach directly to the fan through small holes, the only issue is the bent portion of the clip that threads into the hole is not quite long enough and will pop-out as you try to attach the fan to the cooler.
We really wish Thermaltake would have thought this design decision through a bit more as this could have easily been avoided.
TECHNOLOGY X TEST PROTOCOL
At Technology X, we test our CPU coolers slightly different depending upon the cooler’s marketed purpose, whether it be for a silent operation or extreme overclocking. Our goal is to test in a system that has been optimized with our SSD Optimization Guide, however, CPU C State alteration may or may not have occurred depending on the motherboard and BIOS configurations. Additionally, we also try to include links to the benchmarks used in our report so that you as the reader can replicate our tests to confirm that your cooler performs the way it should.
TEST SYSTEM CONFIGURATION
All of the components we use for testing are standard off-the-shelf PC components from major manufacturers and can be purchased at a variety local retailers and online. We’ll also provide links to our components or similar ones that are available for those of you that find an interest in our equipment.
| PC CHASSIS: | Cooler Master Storm Sniper |
| MOTHERBOARD: | ASRock X79 Extreme4 |
| CPU: | Intel Core i7 3820 @ 4.4GHz |
| MEMORY: | 16GB Corsair Vengeance LP DDR3 @ 1600MHz |
| CPU COOLER: | N/A |
| GRAPHICS CARD: | ASUS STRIX GTX 970 |
| POWER SUPPLY: | Corsair TX850 v2 |
| SYSTEM COOLING: | 3x 200mm, 2x 120mm 1x140mm CM Fans |
| STORAGE: | Samsung 840 250GB |
We tested the cooler using Prime95; a stress-testing application used for testing system stability, by simulating a full-processing load. It’s a great application for testing new systems as well as overclocks and CPU cooler performance.
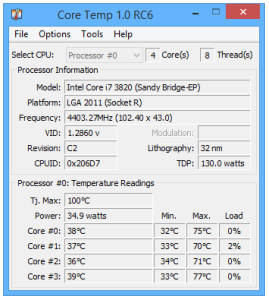
We monitored our processor’s temperature using CoreTemp; a lightweight application which runs in the background and displays detailed CPU temperature information on a per-core basis.
COOLING PERFORMANCE
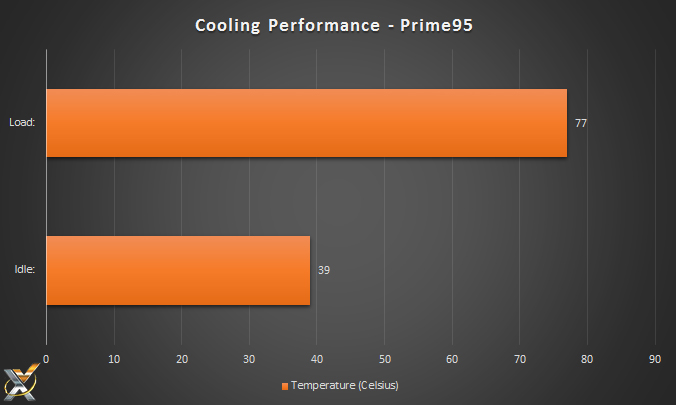
For our test we ran Prime95 for 1 hour on the “Blend” preset with the cooler’s fans on full speed. Our room’s temperature was approximately 23 degrees Celsius (or 75 degrees Fahrenheit).
The CPU in our test setup is a Core i7 3820 overclocked to a modest 4.4 GHz.
Here we can see that cooler is capable of keeping our overclocked processor to a reasonably cool 77 C, far below the Tj. max (maximum thermal junction) of 100 C. It also idles at an average of 39 C, which is just 16 C (or 60 F) over our ambient temperature. Which is fairly respectable for a cooler of this price, but not breathtaking by any means.
NOISE LEVELS
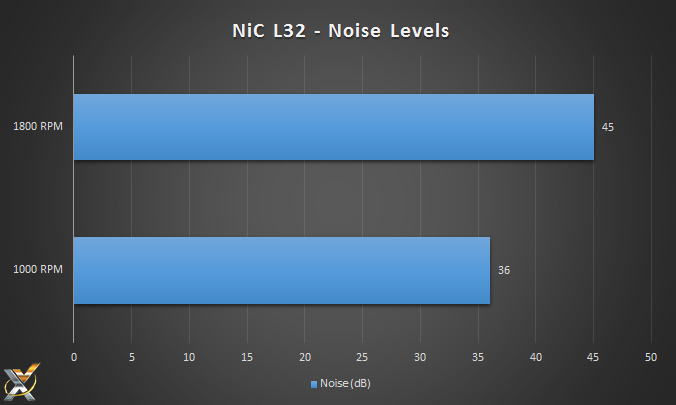
We tested the cooler’s noise output by using a sound meter placed near the system’s case with the side-panel closed. We tested the cooler at both full speed (1800 RPM) and an idle speed of 1000 RPM. We also tested the sound of our overall system’s cooling without the cooler’s fan turned on to illustrate the difference. That result was an average of 32 dB.
As we can see, the NiC L32 outputs a noise level of 45 dB at full speed, which we found to be quite loud. At idle, it was much more pleasant as it was only slightly louder than the rest of our system at 36 dB.
It seems the fan on the NiC L32 is quite a bit louder than the 38.4 dB that Thermaltake suggests. Disappointing, but not surprising.
REPORT ANALYSIS AND FINAL THOUGHTS
We really like what Thermaltake is going for with the NiC L32. They wanted to make a compact, inexpensive cooler that can perform as well as the larger alternatives. In that respect, they accomplished their goals. Unfortunately though; they didn’t do more . While inexpensive, it is still a bit pricier than comparable alternatives, albeit those coolers will lack the “non-interference” design of the L32, a trade-off most users will probably be willing to make in favor of avoiding loud noise and installation woes.
The NiC L32 is plagued with issues ranging from non-universal fan compatibility, ill-thought fan installation procedures and loud fan noise. If you’ve been following along, you may have noticed a trend here: almost all of the issues that surround the cooler are with its fan.
We really feel that if Thermaltake would have included a better quality fan with easier installation (making the clips a little longer would help) that it would have had a worthy contender on its hands, but instead I really can’t recommend the NiC L32, unless size is a serious issue and you don’t want to spend a few extra bucks on a 120mm closed-loop liquid cooler, like the Corsair H55, which would be quieter and easier to install, while offering compatibility for virtually any 120mm fan.
Check out the Thermaltake NiC L32 on Amazon Today!
Review Overview
Design
Build Quality
Performance
Noise
Price
Mediocre
The NiC L32 has lots of potential, but is plagued with many issues including ill-thought installation procedures, loud fan noise and non-universal fan compatibility.
 Technology X Tomorrow's Technology Today!

