APP & FEATURES
This was a breeze and we have to hand it to Remocam, installation could have been done by a monkey with ease. Simply plug in the Remocam and install the app for your iPhone or Android. For this review we will be using an iPhone 6. The app was easy to install and as soon as we loaded it up we were brought to the sign in screen. Sign in or Sign up depending on if you do or do not have an account yet. Once you get to the main screen which looks like the screen below, you’ll click the “+” in the top right corner and it will walk you through the steps to setting your Remocam to your app. This process was fairly easy. We had some questionable moments when waiting for the Remocam to read the Q-code, but bear with it and it will eventually tell you it accepted and is setting up. Remocam works on 5G networks which is great as the last review on the iFamCare did not quite have that ability. Once you’re on the main page you’ll see this screen.
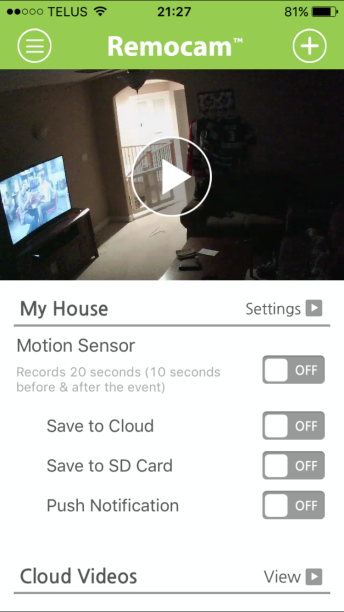 On this page you have the settings for you motion sensor and recording options. As you can see it’s fairly straight forward. You have the ability to save to an micro-SD card and/or to the cloud. This is great for home security purposes as if an intruder steals the micro-SD you still have cloud video. The option to have push notifications is there as well. If you click the “Settings” tab you’ll be directed to the following page.
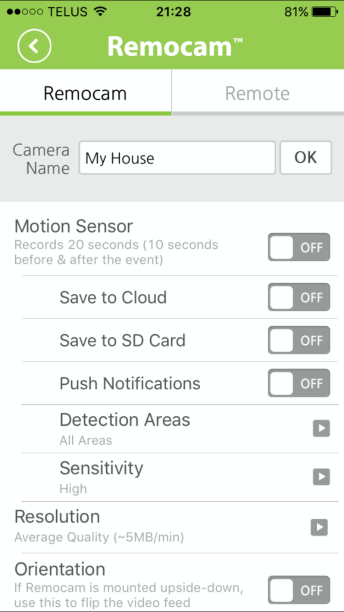 This here allows you a few more options for the app such as setting detection areas, sensitivity, resolution and orientation. The detection areas setting is quite useful as it allows you to pinpoint specific areas to monitor, this comes in handy if you have pets and want them to be able to wander free while only monitoring areas above their height. There is the option for large, small or entire area monitoring. As seen below you just simply check mark the area you wish to monitor, unfortunately you can only monitor one checked area and not multiple.
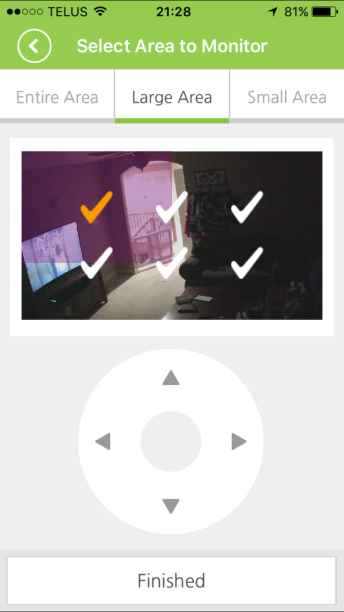
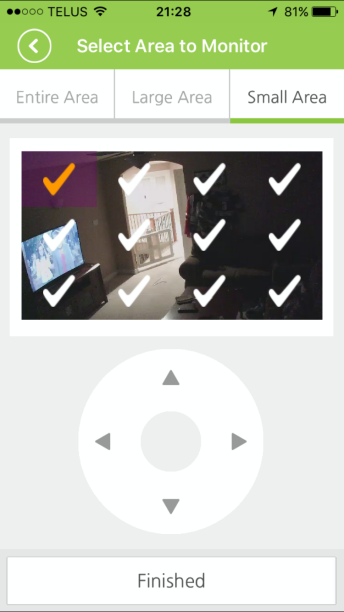
Also, if you have this mounted high on a wall it will be a little more difficult to use the detection areas to avoid pet use as the angle will eventually go low. Resolution is max at 720p HD, There is also average and low quality if you wish to save room on your SD card or just have smaller videos to download to your sell when the motion sensor is tripped. Remocam covers the bases by saying at the bottom of the page to beware of your carrier rates as this will be data to download to your device.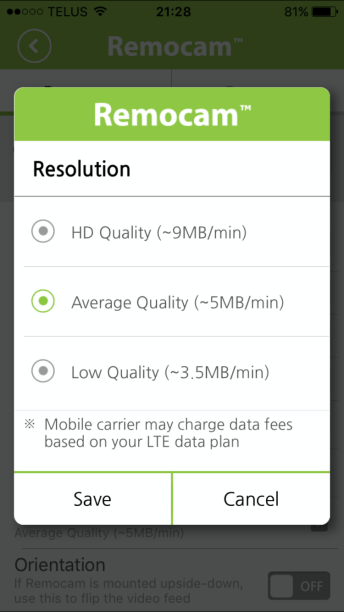 You can also change the orientation of the camera in case you have it mounted upside down from the ceiling. Next if you click on the “Remote” tab this is where you will be able to use the receiver function, being able to control your television or whatever else you can manage to program. This is helpful in the scenario of being away from home and if you wish to create the illusion that someone is home. Turning the TV on for a while or lights if you have Smart Home lighting. The set up is super easy and when you use the function the you simply click the power button or which ever function you’ve programmed and the Remocam will move to the device and power it on or off.
 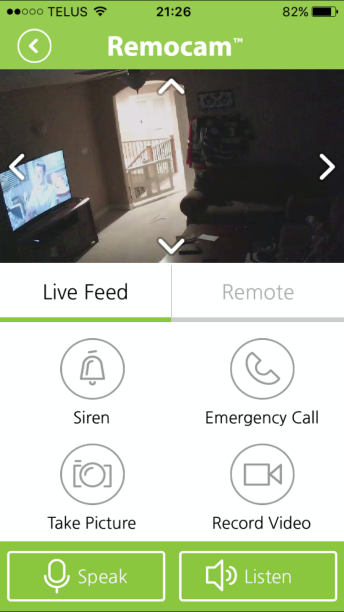 Back to the main screen you’ll click on the view of the room and you’ll be brought to the camera view and options as shown above. You can orient your device sideways to have a larger view if you wish to. Now you will see all the options, in the profile view it is spelt out pretty simply with the words besides the logo functions if you’re in the landscape view then just match up the symbols and they have the same function.
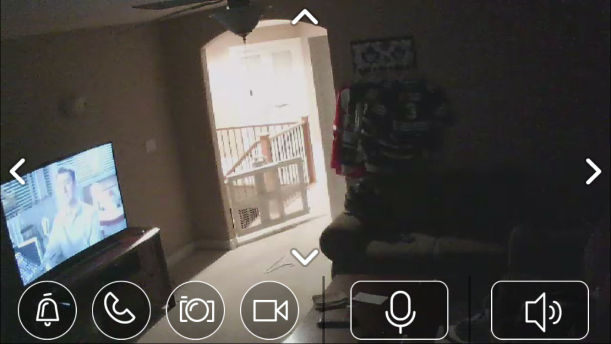
The Siren function sets an alarm off to hopefully scare an intruder and have them leave the area you see them at. There is also an emergency call function beside that which has 911 pre-programmed but you can also install other numbers. You can also snap a picture or record video on command. Finally are the two largest options which is to talk or to hear what is happening in the room if you wish to simply communicate with the people or pets in the room, your choice! The biggest thing to us is the arrows which allow you to move the camera, as we mentioned with iFamCare’s Helmet, that is something they were missing and this makes controlling the Remocam so much easier as you can move it in increments and it’s not guessing and over-shooting. When it gets too dark, night vision kicks in and the view is just as clear as day-light.
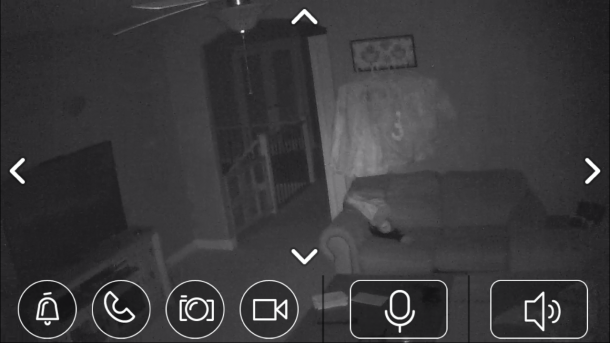
With the night vision capability and the 335 degree pan and 95 degree tilt, it’ll be nearly impossible to miss anything happening in the vicinity. The next feature is the one that ties the Remocam right into that Smart Home category and that is the ability to remotely control your home devices. 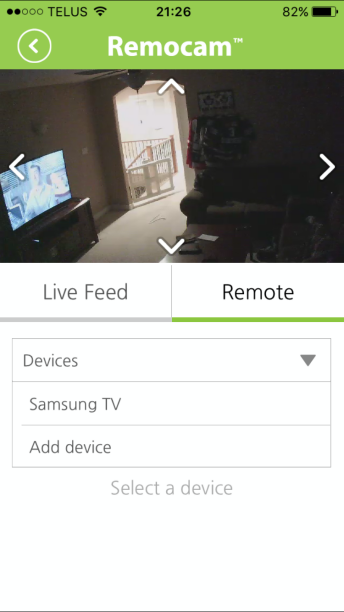
The screenshot above shows the remote programming screen. As you can see we have programmed our Samsung TV to the Remocam and it was extremely easy. Click “Add device” and it walks you right through the steps. Not only is this feature useful in the scenario that you forget any of your remote devices on when you leave the home but on extended trips when you wish to create the illusion of being home to deter thefts you can turn any of your remote devices on, given they are in view and range of the Remocam. With the diversity of smart home devices out there now you can basically run your home from anywhere with a functioning smartphone.
Review Overview
Visuals and Structure
Ease of Installation
Remocam App
Features
Price
Tuned In!
Remocam has thoroughly impressed us with this Smart Home system and now we look forward to the Remobell!
 Technology X Tomorrow's Technology Today!
