TECHNOLOGY X TESTING PROTOCOL
At Technology X, we test our RAM slightly different depending upon the product’s marketed purpose, whether it be an entry-level budget kit or a high-end enthusiast level kit. Our goal is to test in a system that has been optimized with our SSD Optimization Guide, however, CPU C State alteration may or may not have occurred depending on the motherboard and BIOS configurations. Additionally, we also try to include links to the benchmarks used in our report so that you as the reader can replicate our tests to confirm that your system performs the way it should
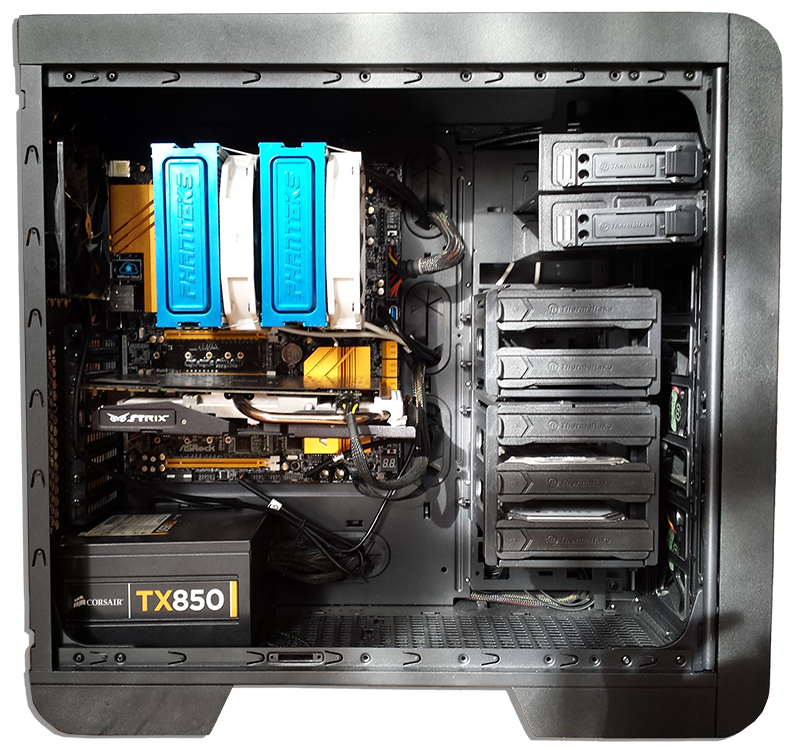
TECHNOLOGY X TEST BENCH
All of the components we use for testing are standard off-the-shelf PC components from major manufacturers, which can be purchased at a variety local retailers and online. We’ll also provide links to our components for those of you that find an interest in our equipment.
We’d like to thank Intel and ASRock for providing vital components in this test bench, without which this report would not be possible. Check out our review of the Intel Core i7 5960X and the ASRock X99 OC Formula used in this report.
| PC CHASSIS: | Thermaltake Core V51 |
| MOTHERBOARD: | ASRock X99 OC Formula |
| CPU: | Intel Core i7 5960X @ 4.0GHZ OC |
| MEMORY: | N/A |
| CPU COOLER: | Phanteks PH-TC14PE |
| POWER SUPPLY: | Corsair TX850 v2 |
| GRAPHICS CARD: | ASUS STRIX GTX 970 OC |
| STORAGE: | Samsung 840 250GB, ADATA 1TB Premiere Pro SSD |
BENCHMARK SOFTWARE
To test our RAM we’ll use a variety of benchmarking tools and productivity applications including AIDA64, Cinebench R15, WinRAR and Photoshop CC. We’ll also do some gaming tests using FRAPS to measure FPS performance.
OVERCLOCKING AND LATENCY TUNING
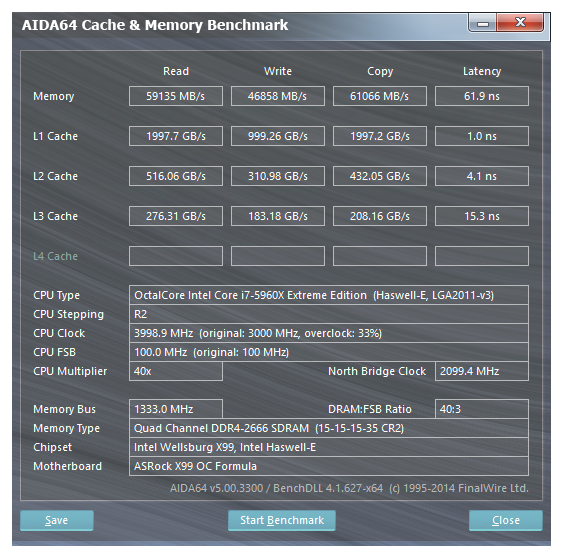
To test our RAM, we’ll be doing some overclocking and latency tuning to see what the best settings we can run the RAM at outside of its guaranteed rating of 2666MHz memory speed and 15-15-15-35 timings. However, before we start tuning, we’ll run a memory benchmark using AIDA64 to get a performance baseline.
 Now that we know what our RAM performs at with the rated specifications we’ll get to work. After some tweaking, we were able to get some fairly decent results, however it is worth noting we were unable to successfully get our timings down below CL14 (14-14-14-34) and get the system to post. Also, in order to get it to post at all with a speed of 2666MHz and timings below the stock CL15, we had to increase our memory voltage from 1.200v to 1.250v. That being said, it isn’t all bad news as we were also able to easily overclock our kit well past the rated speeds to 3000MHz, with a the rated timings of CL15 (15-15-15-35) at a voltage of 1.350v.
So to recap, here are the configurations we’ll be testing our kit at:
| Speed: | Timings |
| 2400: | 14-14-14-34 |
| 2666: | 14-14-14-34 |
| 3000: | 15-15-15-35 |
So, it took a bit of tweaking but we were able to get some fairly decent results in the end, which is all that matters, right? Now let’s find out if all this work has actually paid off.
Review Overview
Product Build
Performance
Design
Warranty
Price
Overclocking Phenom!
The G.Skill Ripjaws 4 offers exceptional overclocking performance at a very competitive price. Which makes it a top choice for enthusiasts!
 Technology X Tomorrow's Technology Today!


Donny, please post a screenshot of Thaiphoon Burner utility next time, since you did not provide anything from SPD.
About to pull the trigger on ripjaws ram and this heat sink. Glad to know the clearance is there.
It is, but because of the overall bulk of the cooler it is advised to install the RAM first, and then the cooler as doing it the other way around can be a hassle.