HARDWARE INSTALLATION
In our initial inspections of the Cougar Archon mid-tower case, two areas of concern were identified. The first and foremost, and one that affects virtually all aspects of building a system into the Archon, is cable management. Lack of space behind the motherboard tray means careful planning will be required for all cable routings. A mid-side-panel bulge just isn’t the same as having that extra couple of millimeters of space across the entire side panel area, from edge to edge. Utilizing a modular power supply, if at all possible, is highly recommended with the Archon case.
Our second area of concern was discovering that any front panel fans would need to be mounted directly to the “removable and easily cleanable” front fan filter. Consequently, this will be the first part of this build that we will address.
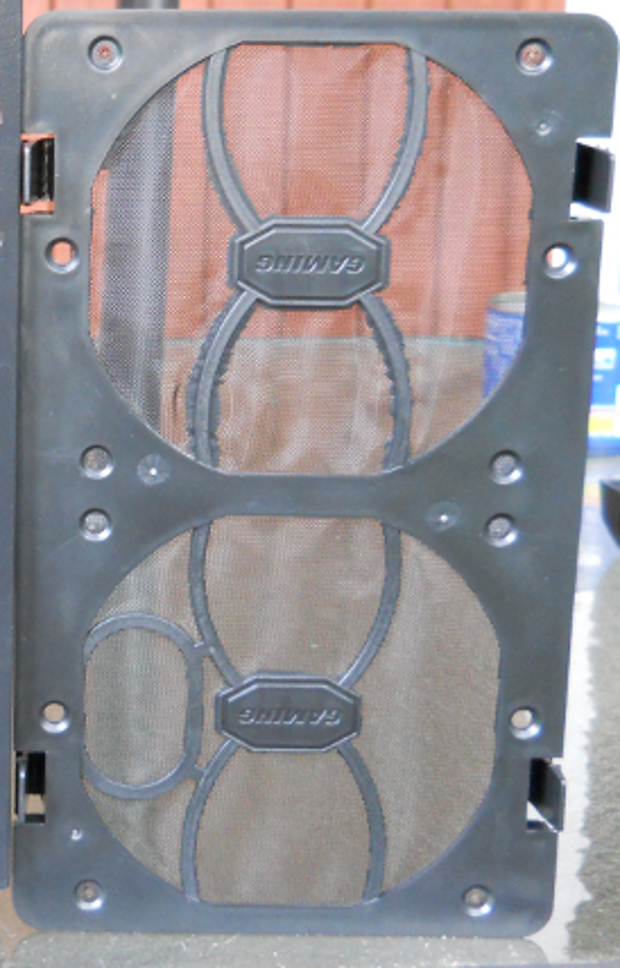
In the close-up image above of the front fan filter, we can see the mounting holes that correspond to two 120mm fans. We also see present one set of 140mm fan mounting holes that would have the fan straddling the two fan openings. A 140mm fan mounted in that position would likely have a portion of its airflow blocked by the plastic non-filter area that spans the center of the filter frame. In Cougar’s defense, they are not advertising the presence of the 140mm fan mounting, but it is present on the filter never the less.
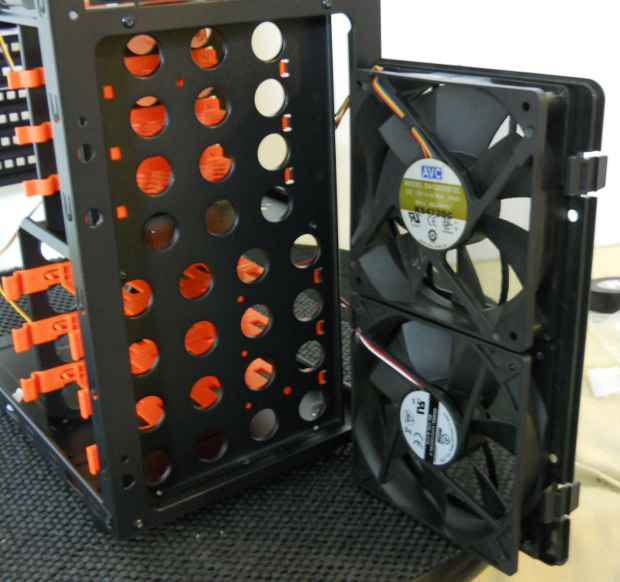
In this image we see the front fan filter with a pair of 120mm fans mounted to it. We have noted earlier in the review that our sample Archon case came with a warped front filter. Even after mounting a single 120mm fan to the filter, it would not stay latched in place due to this distortion. Interestingly enough though, once we had mounted the second 120mm fan securely to the filter, the warped corner was now drawn flat against the case fan’s frame, effectively eliminating the warp completely. Now the filter and fans as an assembly snapped into place into the fan cavity, and seemed to hold securely. My other concern about this fan mounting setup, is that there is a definite possibility of vibration, which manifests itself as increased fan noise, if this filter does not stay firmly and tightly latched to the front of the case.
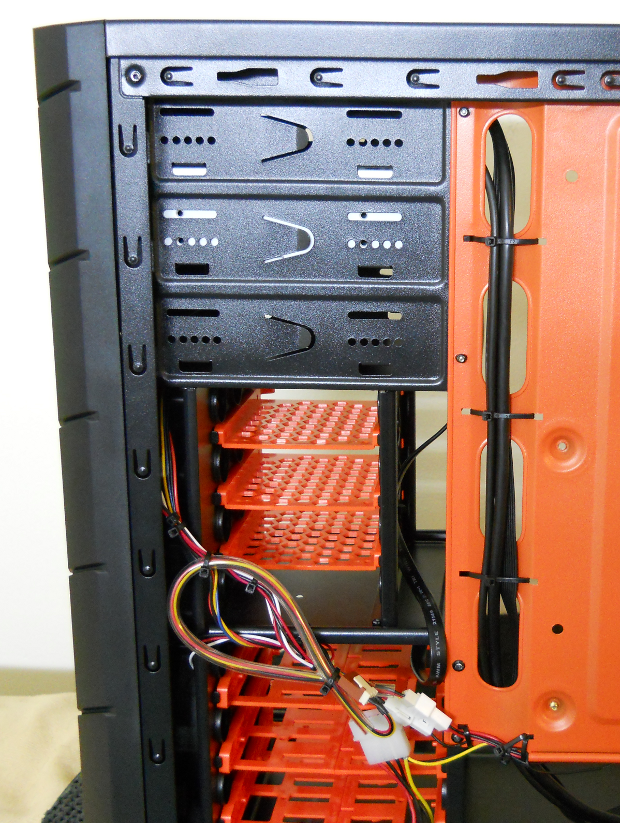
Next we mounted our optical drive, which was a piece of cake with the Archon’s tool-less 90-degree-knob-turn latch. We are not much of a fan of tool-less mountings to begin with, but this one works surprisingly well. We went ahead and connected a SATA data cable to the optical drive, and routed that cable out of the way of front fan airflow. In the image above, you can see where we have used cable ties to secure the cluster of front panel connectors to the nifty extension at the side of the motherboard tray. You can also see the SATA data cable for the optical drive that we have routed around the edge of the panel between the HDD/SSD cages, leaving just enough length curving back into the motherboard area to reach its SATA ports.
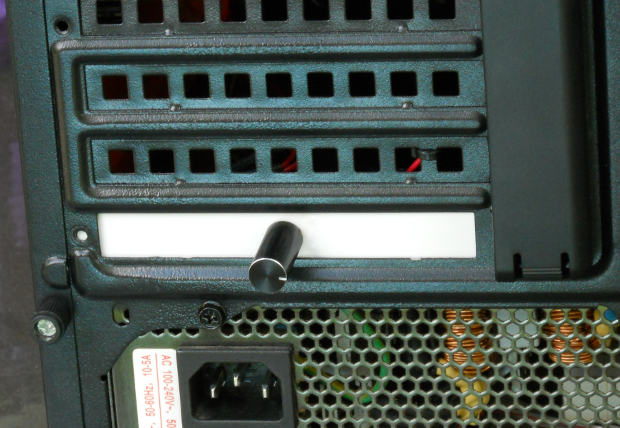
We will also be using a single-channel, 3-fan controller in this build to regulate the speed of our trio of case fans. Since the fan controller will occupy an expansion bay cover slot as seen above, we will wait until the motherboard is in place before installing it. For now we have bundled the front fan cables together and more or less out of the way.
Before we install our mATX motherboard, we need to snap the I/O shield into its opening in the rear of the case. This proved to be the source of much frustration. After several tries with the I/O shield that mates with the mATX motherboard being used, and having no success, we tried two other mATX shields from other boards. After we could get none of them to snap into place, we are forced to draw the conclusion that the I/O shield mounting in the Archon, shown turned sideways in the above image, just is not functioning as I am sure Cougar intended it to. In the end we scrapped the I/O shield altogether and completed the build without one.
We have pre-installed the CPU cooler and the memory DIMMs to our mATX motherboard prior to securing it into the Archon case. This proved to be another source of no small amount of irritation, as in the end we just could not get the upper left motherboard tray mounting dimple to line up correctly with the corresponding motherboard screw hole. Possibly a mis-drilled early production review sample, but problematic none the less. In the end, we left that screw hole under-utilized with an undersized screw.
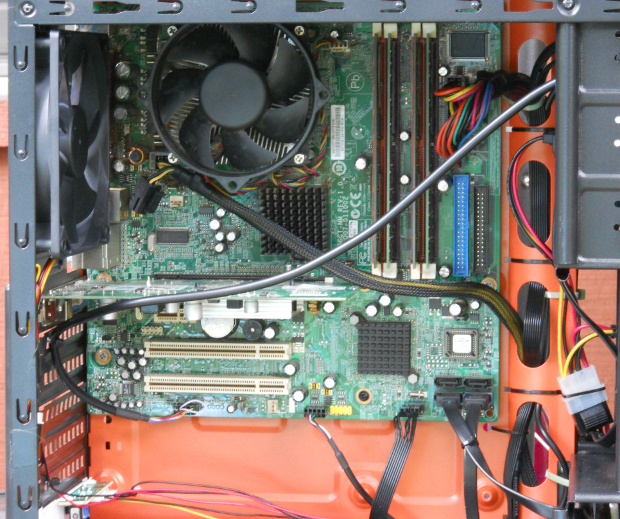
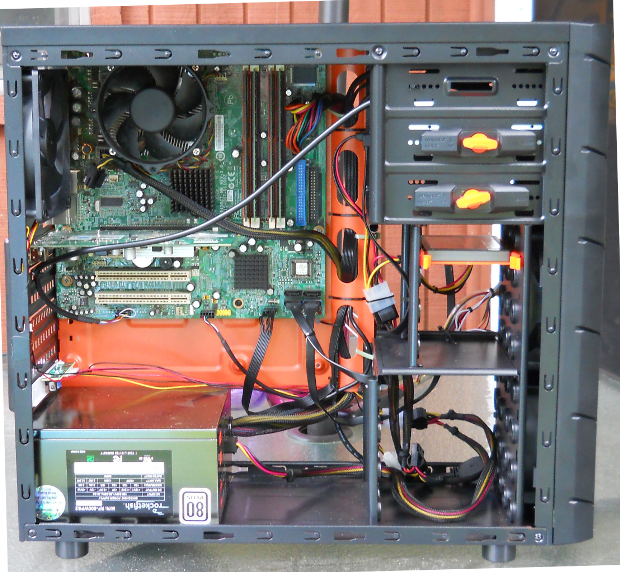
Cable management is every bit as much about improving airflow inside the case as it is about the view through your window side panel. We ran into two instances of unavoidably having to route cabling in front of the motherboard. The first instance concerns the CPU power lead(s). With no usable cable routing hole in that quadrant of the case, we have no choice but to cross in front of the motherboard to reach the connector socket. This situation will apply when using either an mATX or full ATX motherboard.
The second situation involved the front panel audio header connection, but this will not apply if using a full-ATX motherboard. The front panel audio header lead comes up about three inches short of reaching the header on our mATX motherboard, again unless we route it across in front of the board. With a full-ATX board, the lead is just long enough to angle behind the motherboard tray, come under the bottom edge, and just reach the header pins.
After the motherboard is secured and all other cabling has been routed, connected and dressed, we then installed our graphics card and fan controller into their appropriate expansion bay covers and slot. We have chosen to mount the fan controller in the bottom-most cover, again to facilitate airflow inside the case. As shown in images further below, this allows us to route the wiring for the fan controller in a straight horizontal line, parallel to the direction of airflow.
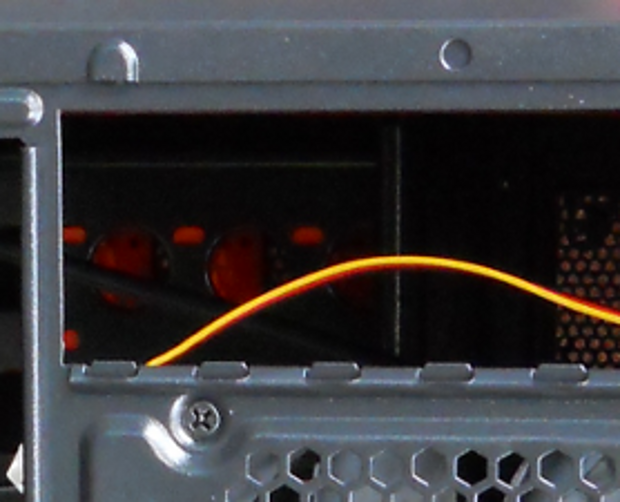
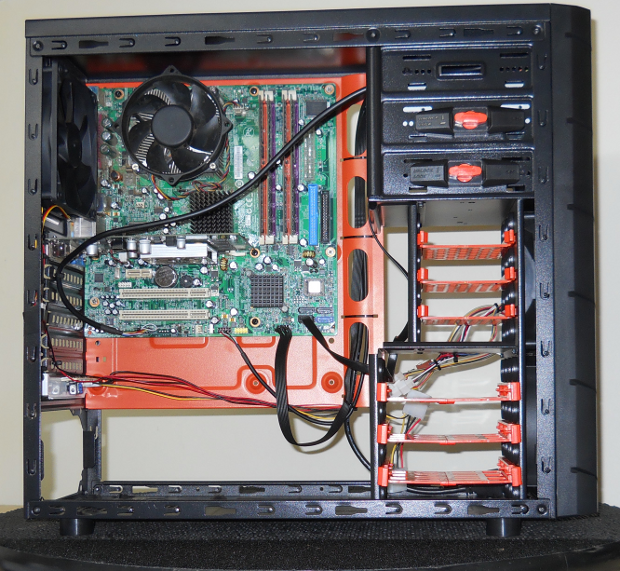
Lastly, we installed a 128GB SSD into the upper-most 2.5″ drive cage tray, and routed and secured the SATA power and data cables for it. We then removed all of the unused HDD/SSD trays, again to improve airflow. We bundled unused power supply connections into a loop and fed them into the lower drive cage area from the rear. Positioning the excess loop to lay on the floor of the case keeps it from blocking any of the airflow from the lower front fan. The final results of our cable management efforts on the front side of the motherboard can be seen above. Use of the modular power supply avoids a huge amount of cable clutter and difficult cable management, especially for the area between the power supply and the lower drive cage.
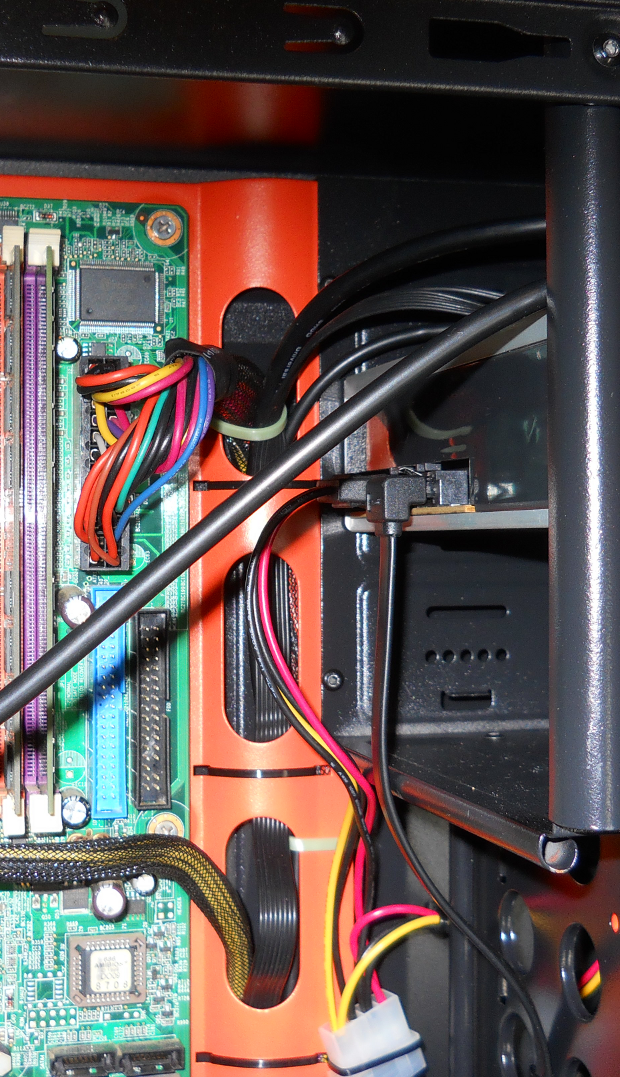
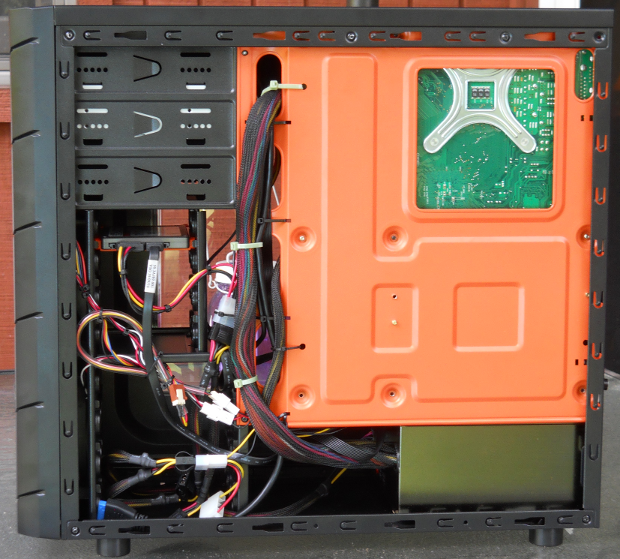
This image demonstrates the effectiveness of the extra curved flange on the motherboard tray, and its cable routing holes. With four separate oblong holes, excess wiring is much easier to keep behind the motherboard tray and drive cages where it belongs. In order to achieve the front-view results above, we end up with a rear view something like this:
By utilizing a modular power supply, we were able to keep the required power supply leads to a minimum. The 24-wire main power lead to the motherboard was able to be secured to the curved motherboard tray extension, keeping it out from behind the motherboard tray completely. The non-modular CPU power connection had to be routed in front of the motherboard, as discussed previously. The unused non-modular graphics card power connectors were able to be stashed out of the way in the bottom of the lower drive cage. We were able to power the optical drive, the SSD and the fan controller (giving power to all three fans) all from a single modular power supply connector. Unused connectors from this single lead were easily concealed. With some careful planning and cable management, we were able to create a fairly tidy build. We were able to slide the right side panel back in place with zero interference.
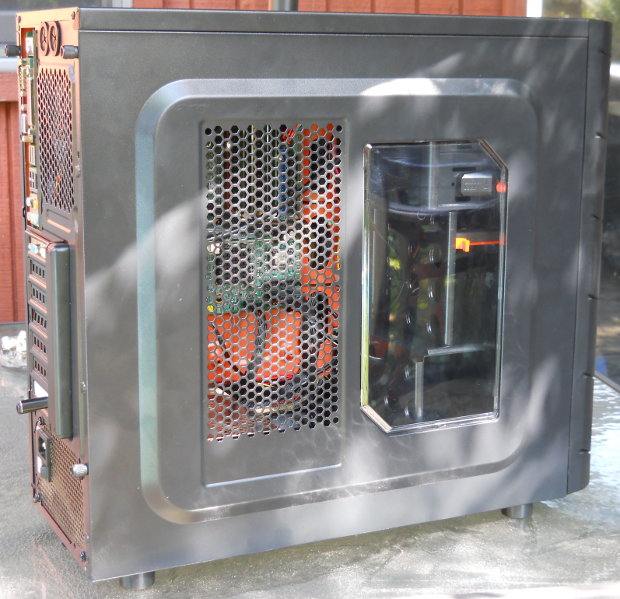
The off-kilter position of the side window makes viewing the interior of the final build a little difficult, regardless of viewing angle. Once we powered the system up to test operability, we were pleasantly surprised at the level of fan noise. Even with all three case fans at full power, the noise level was more than reasonable, especially for a $49.00 mid-tower case.
 Technology X Tomorrow's Technology Today!



The worst rewiew in the world.
“Unfortunately, we will have to relegate the Archon to the “Not Recommended” list.”
Have you seen the price for this case?
For 40$ this case is the best buy!
i have this case.. did not encounter problems snapping on the I/O shield nor having to run any of the front panel cables in front.. only downside i can see would be
1. the lack of fan mounts on top, for better cooling or rad mounting and
2. when placing 120mm fans on the side panel, you cannot put in aftermarket coolers like the cm hyper 212 evo or deepcool gammaxx 400. (you can if you leave the side panel open). you can go wtih watercoolering options like corsair h60. for the price, this is still a fairly nice case.