Build
The H500P build went flawlessly and given the massive size of the case even the largest of hands wouldn’t have a problem manipulating the interior space provided.
First thing you’ll end up needing to do is adding a few of the included standoff screws to set up for the proper size motherboard you’ll be installing. In this build we went with our ASRock Z170M Extreme 4.
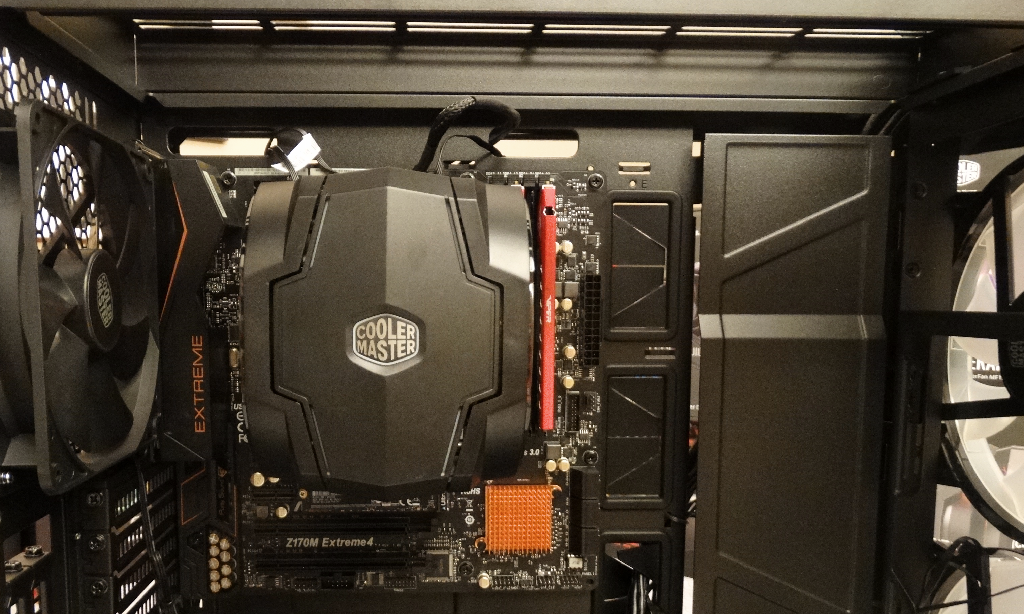 The board fit perfectly and lined up with the chassis’ rubber grommets with ease. This will make for clean and easy access for running cables later on. You’ll also notice the abundance of space above the motherboard for liquid cooling or fan installation options.
This is also your sneak peek look at the MasterAir MA610P. Power and sturdy, it fit the build like a charm. There is tons of extra clearance if you decide to go with a larger you have clearance from the tempered glass panel of 190mm.
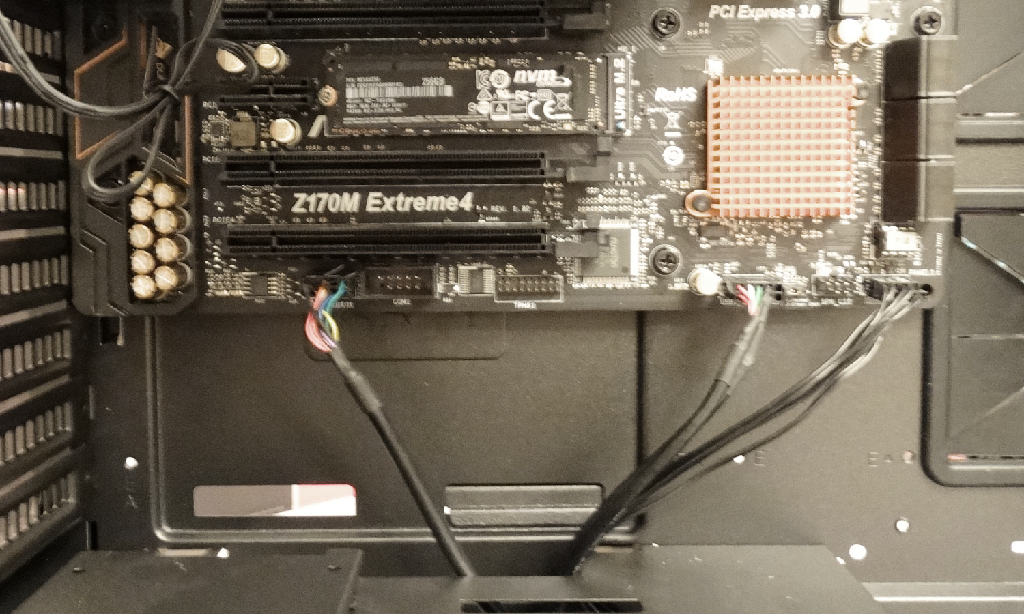 The cut out in the top of the PSU cover also allows for easy access of your I/O panel cables to the motherboard. We have seen it too many times before where the cables have to run from the grommets and this way just makes for a much more clean appearance.
Our PNY GeForce GTX 980 is loaded in the vertical position, this is another one of those “show off your parts” options that will be sure to make some of those aesthetics enthusiasts happy about the H500P.
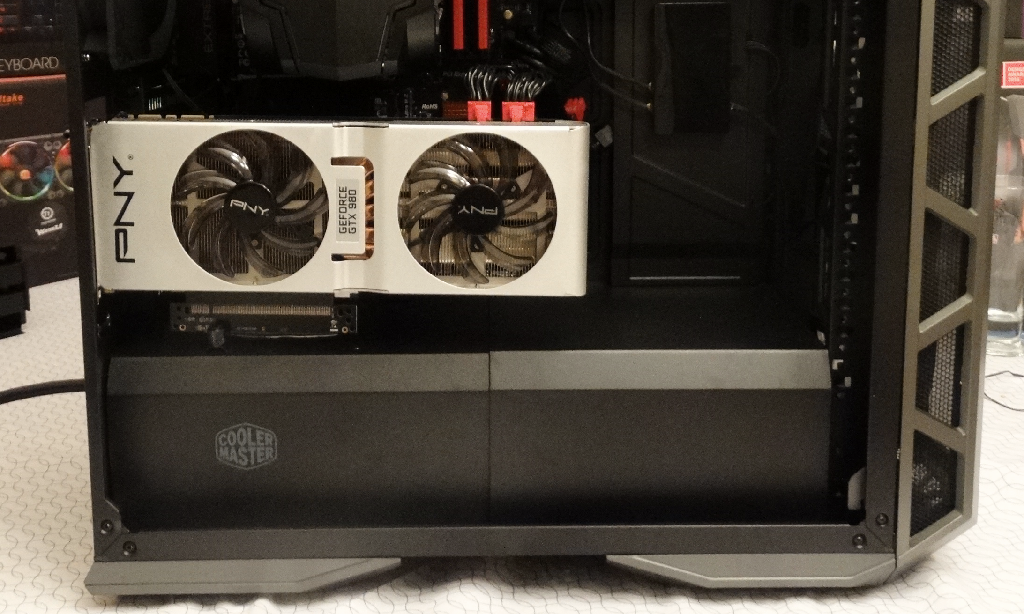 The ample room for extended sized parts means you can fit a graphics card up to 412mm without a problem.
At this point you can also see that we have the PSU cover completely replaced and all cables running from it are not visible which leaves an impeccable look.
For added effect we have also added two top mounted MasterFan 120 Pro Air Flow RGB fans.
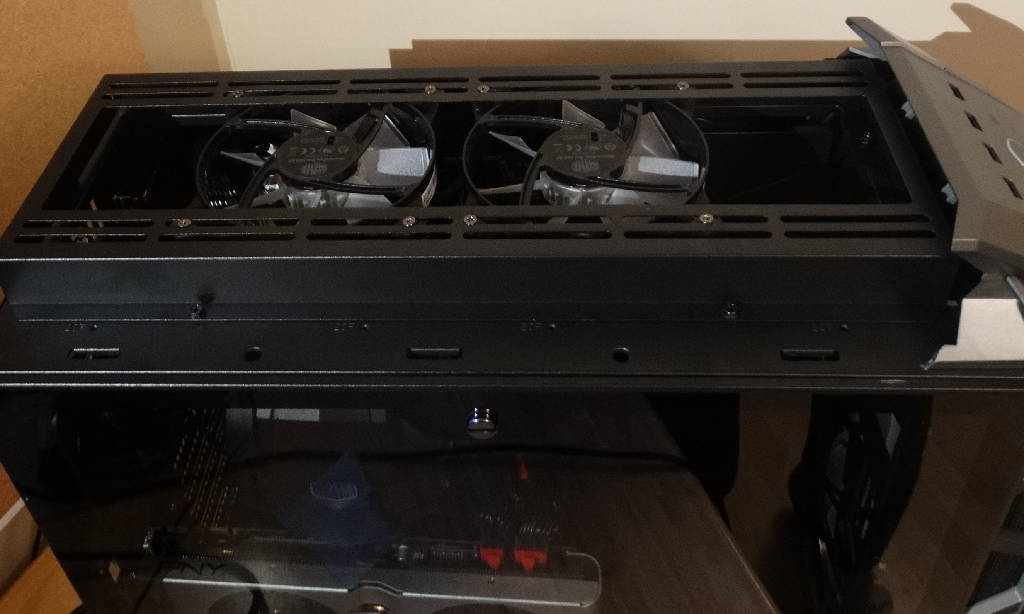 There was plenty space for another 120 or even to put three 140mm fans in. There is even the option to install two more 200mm fans in the top panel if you remove the support bracket for the 120/140 fans. At this point we wish we had two more 200mm fans because that would have looked outstanding.
You may have noticed in an earlier photo but all of our RGB fans are going to be powered by CoolerMasters RGB hub.
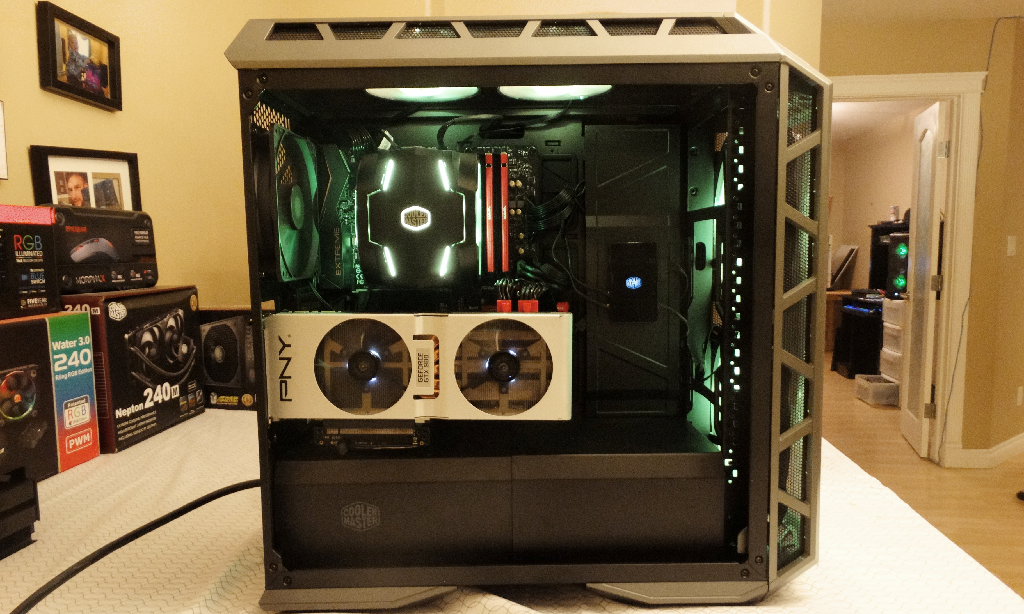 Doesn’t that look outstanding!
With the build full and complete you can still see the outrageous amount of space still available in the case. We managed to use our RGB hub to fill up a little of the more forward space of the chassis.
Around the far side you’ll notice the cable management cover as well as the cpu cooler cover give the look of there not even being any cables.
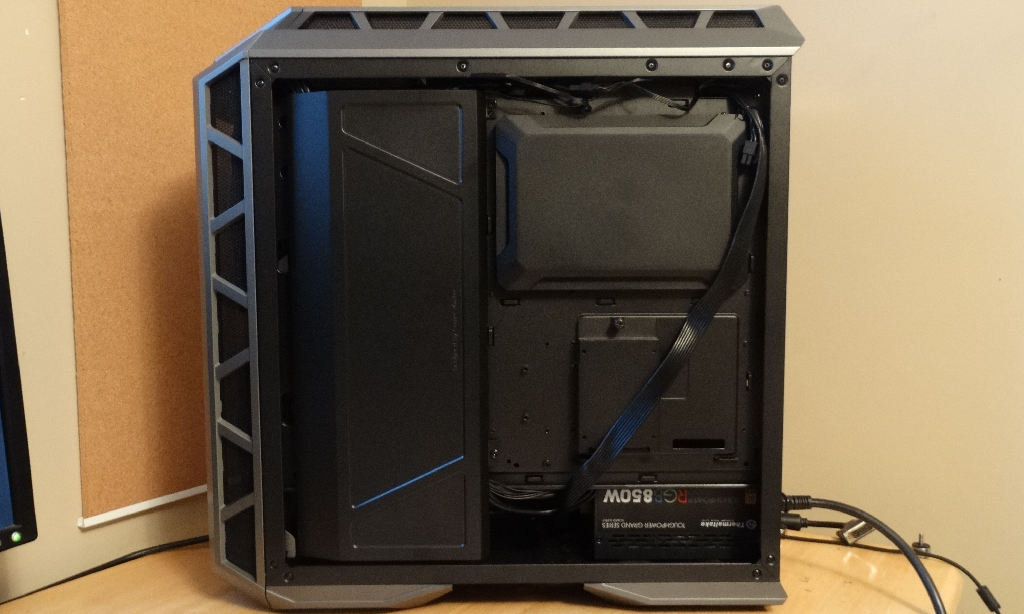 This is great and gives an amazing look, however the back panel is steel and you can’t see through. This would be the perfect look for a second tempered glass panel. You could throw some RGB strips back there and really light up both sides of the case. Given all the effort that went into making this side look so neat, why not make it visible?
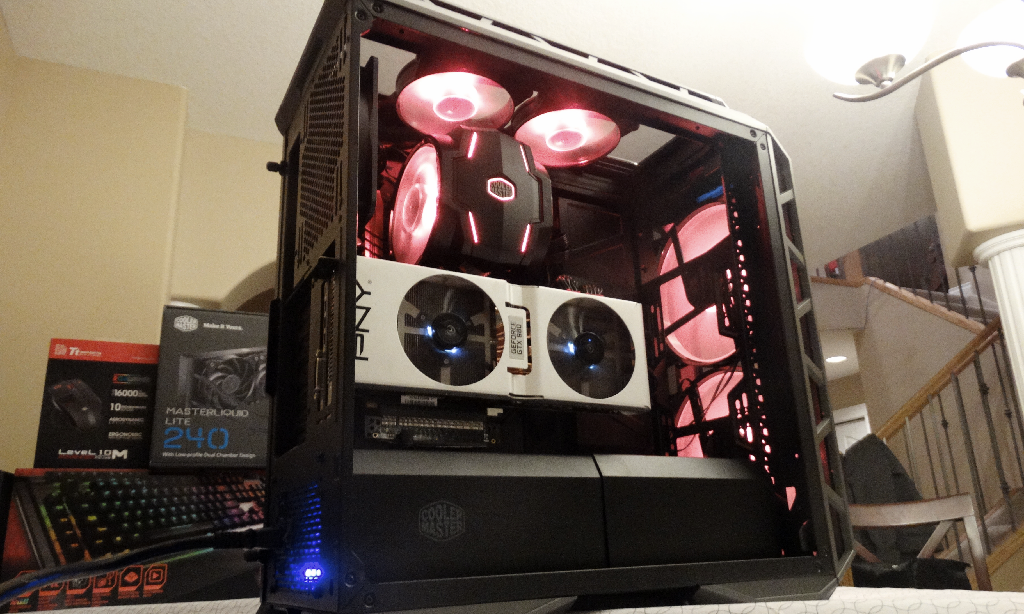 Overall, this build went perfectly. From your first glance at the chassis you know you won’t have any problems fitting the majority of any components you can think of and with the promise of a glowing system, you are sure to be happy to have the H500P as your battleground.
Review Overview
Packaging & Contents
Component Compatibilty
Features
Build
Price
Amazing!
Cooler Masters H500P is an outstanding case at a reasonable price for the options included and the dedication that clearly went into its construction.
 Technology X Tomorrow's Technology Today!
