TECHNOLOGY X TESTING PROTOCOL
At Technology X, we test our RAM slightly different depending upon the product’s marketed purpose, whether it be an entry-level budget kit or a high-end enthusiast level kit. Our goal is to test in a system that has been optimized with our SSD Optimization Guide, however, CPU C State alteration may or may not have occurred depending on the motherboard and BIOS configurations. Additionally, we also try to include links to the benchmarks used in our report so that you as the reader can replicate our tests to confirm that your system performs the way it should
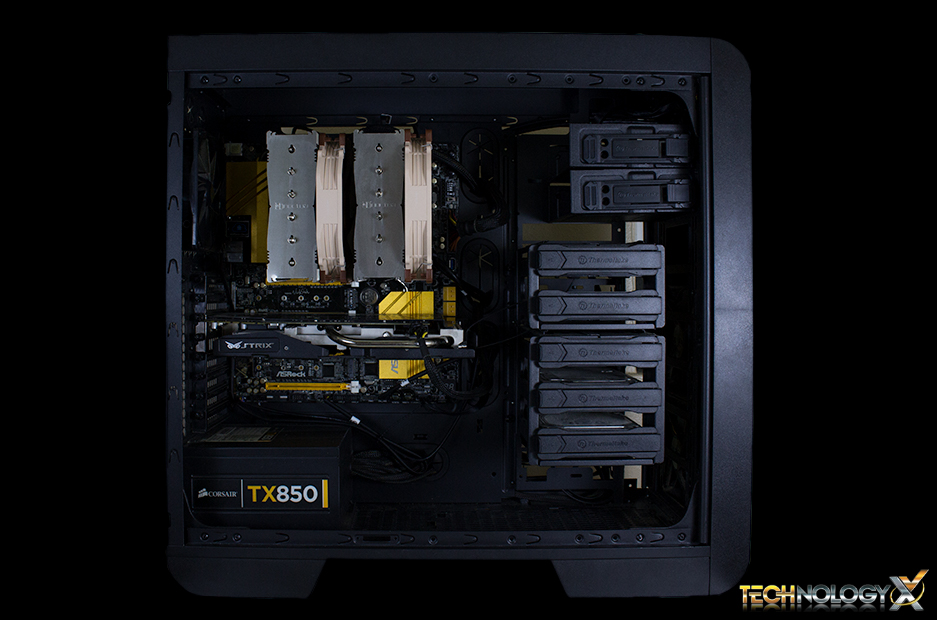
TECHNOLOGY X TEST BENCH
All of the components we use for testing are standard off-the-shelf PC components from major manufacturers, which can be purchased at a variety local retailers and online. We’ll also provide links to our components for those of you that find an interest in our equipment.
We’d like to thank Intel and ASRock for providing vital components in this test bench, without which this report would not be possible. Check out our review of the Intel Core i7 5960X and the ASRock X99 OC Formula used in this report.
| PC CHASSIS: | Thermaltake Core V51 |
| MOTHERBOARD: | ASRock X99 OC Formula |
| CPU: | Intel Core i7 5960X @ 4.0GHZ OC |
| MEMORY: | N/A |
| CPU COOLER: | Noctua NH-D15 |
| POWER SUPPLY: | Corsair TX850 v2 |
| GRAPHICS CARD: | ASUS STRIX GTX 970 OC |
| STORAGE: | ADATA 1TB Premiere Pro SSD |
BENCHMARK SOFTWARE
To test our RAM we’ll use a variety of benchmarking tools and productivity applications including AIDA64, Cinebench R15, WinRAR, 7-Zip, Photoshop CC, and Handbrake. We’ll also do some gaming tests using FRAPS to measure FPS performance.
OVERCLOCKING AND LATENCY TUNING
Before we get into benchmarking our memory, we’re going to start overclocking and tuning it to see what the best results we can get with it are outside of the guaranteed rated specifications of 2400MHz, and 16-16-16-39.
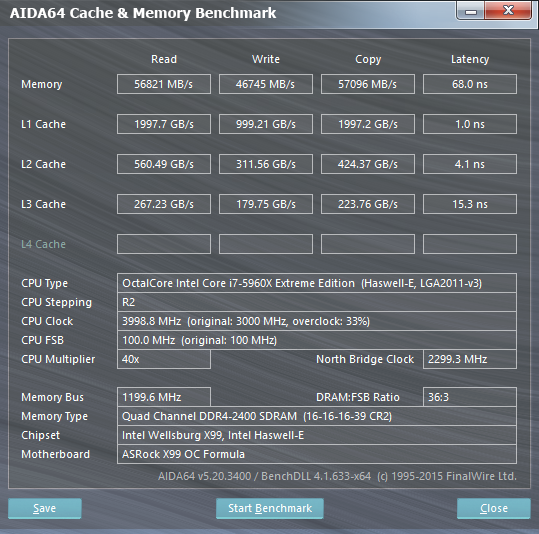
First, we’ll start by running a quick AIDA64 ‘Cache & Memory Benchmark‘ to see what our baseline performance is before tuning.
Now that we’ve got that out-of-the-way, we can start tweaking our memory. After a bit of fine-tuning in the UEFI we were able to get our RAM down to 14-14-14-37, with a speed of 2400MHz by increasing our voltage from 1.200v to 1.250v. Unfortunately, we weren’t able to get our timings down without increasing the voltage, and we were also unable to get them any lower, despite dropping our memory speed down a peg to 2133MHz.
We were able to get a nice overclock on our memory speed to 2666MHz with timings at 15-15-15-38, at the same 1.250v, however pushing further to that to 2800MHz resulted in crashing immediately after booting into the OS, even after increasing our voltage to 1.350v.
Here’s a recap of our final tuning results:
| Speed: | Timings |
| 2133: | 14-14-14-37 |
| 2400: | 14-14-14-37 |
| 2666: | 15-15-15-38 |
So, not too amazing, but definitely not terrible either. While we wish we could have at least got our timings down a little further, we’ll have to withhold judgement until we run through our benchmark suite at these configurations.
Review Overview
Product Build
Performance
Design
Warranty
Price
A Good Kit!
the ADATA XPG Z1 offers respectable performance, some low-level overclocking and a rather cool design, and for the right price is a very appealing memory kit.
 Technology X Tomorrow's Technology Today!


looks like you might have Samsung chips have you tried trd tcrp 16 or 17 when overclocking ? they don’t scale at 15
Hi thanks for the comment, and the tip!
I did in fact try 16, but not 17 when overclocking. Unfortunately, due to time constraints we don’t get to test the RAM as vigorously as we’d like when overclocking, I still have this kit installed, so I may just try turning it up to 17, and report my findings, time allows.
Thanks again for your feedback.